
CAUTION! Ingress of water will cause physical damage!
- Ensure that the cable entry and cable face downwards after installation.
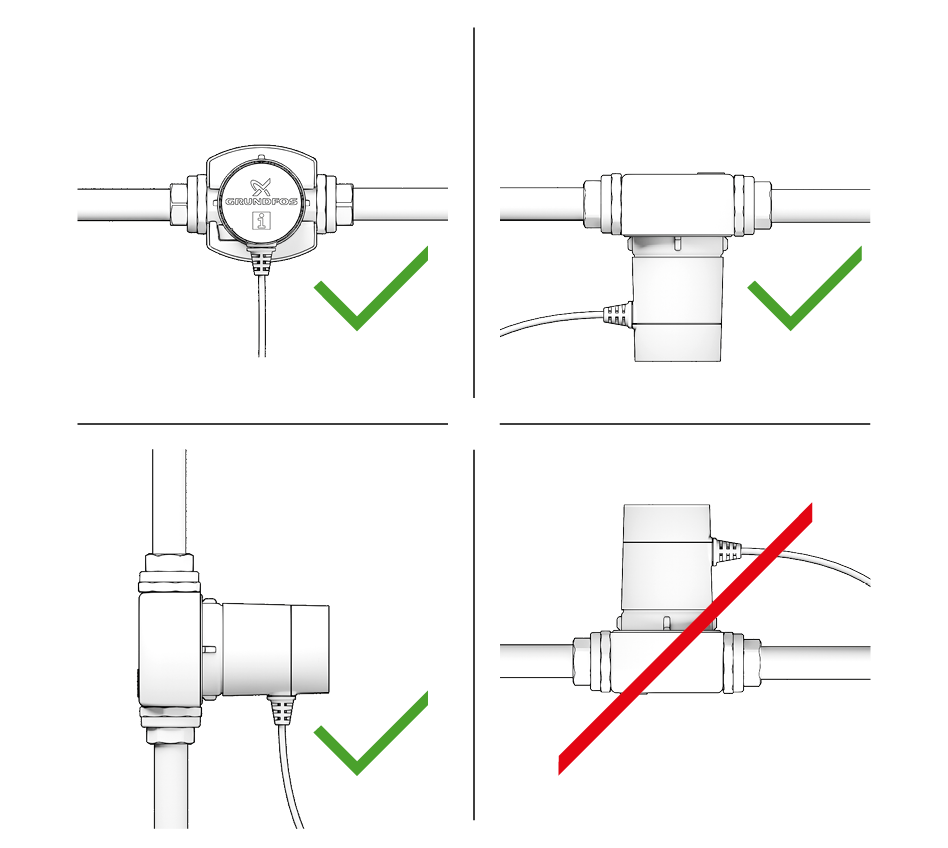
Select a suitable installation site and permissible installation position.
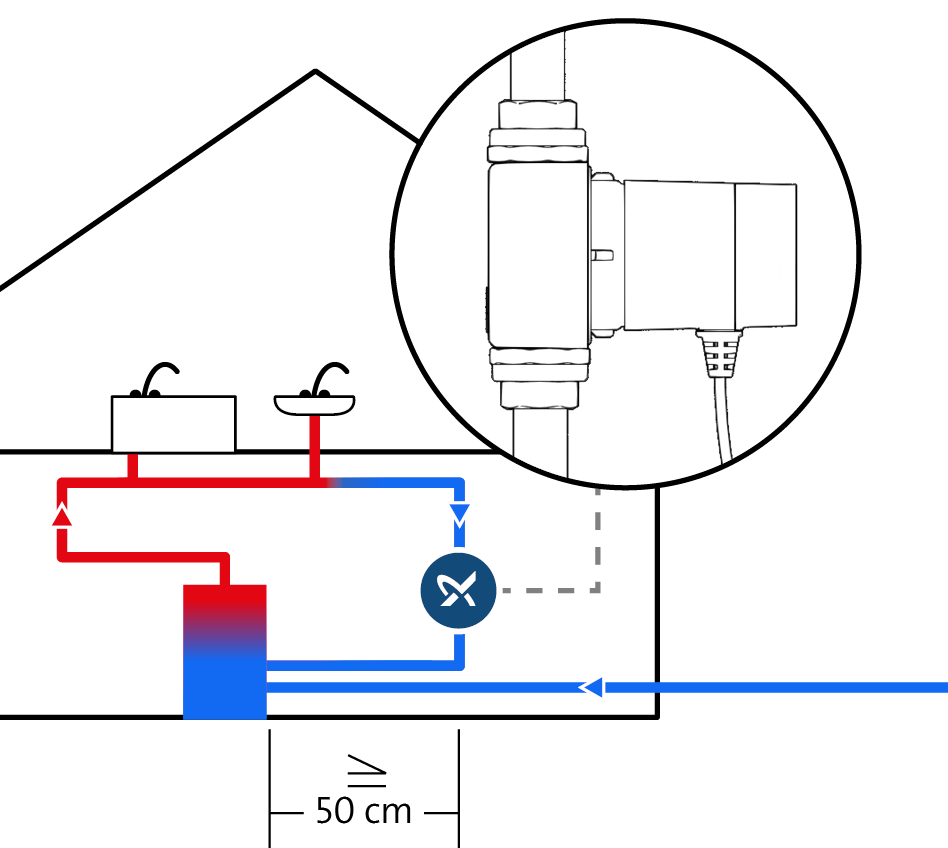
Avoid exposing pumps with temperature mode, such as the T, TDT and TA, to heat:
– Maintain a clearance of at least 50 cm from the DHW heater.
– If the return line opens vertically into the cylinder, install the pump well away from the cylinder entry.
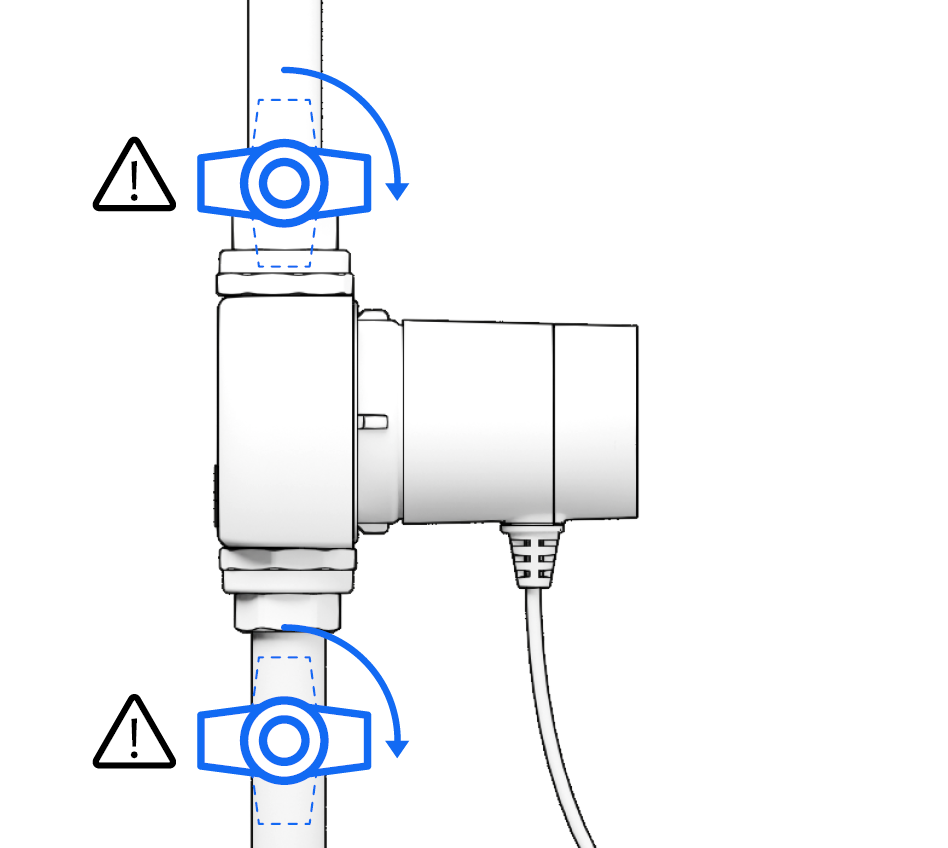
Fit external shut-off (isolating) valves if you need to be able to remove complete pump without draining the system. Integrated shut-off (isolating) valve in pump housing is enough for motor replacement.
- If you are using additional non return or check valve, ensure that is installed in the direction of flow and that has low opening (cracking) pressure of max 0.3 PSI (0.2 kPa or 20 mbar).

Shut off valve and check valve integrated. Check port to port length, connection type and other dimensions.

Line cord included.
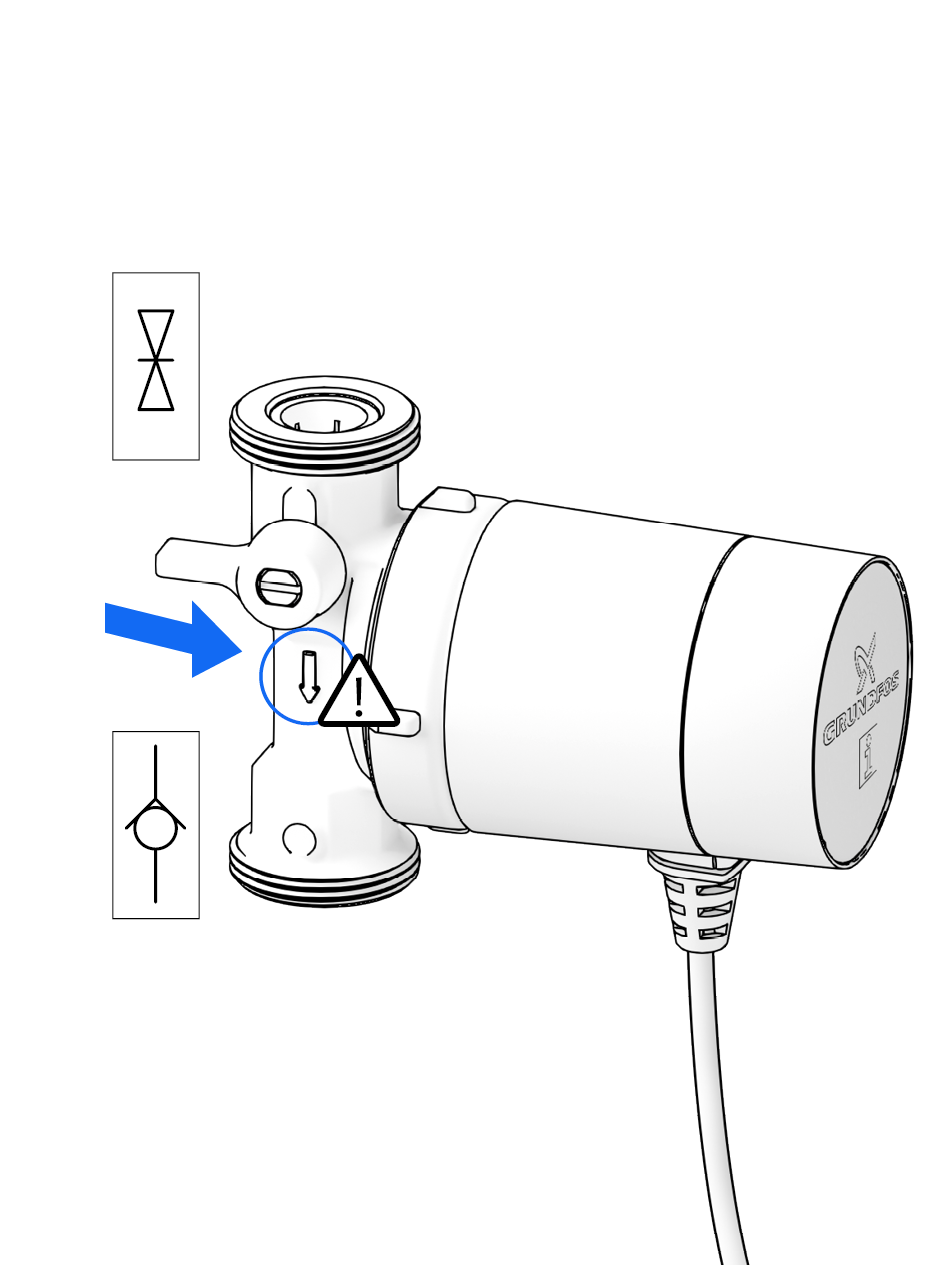
Observe correct direction of flow.

DANGER! Pressurised system!
- Before working on the motor or pump connections, close the shut-off valves.
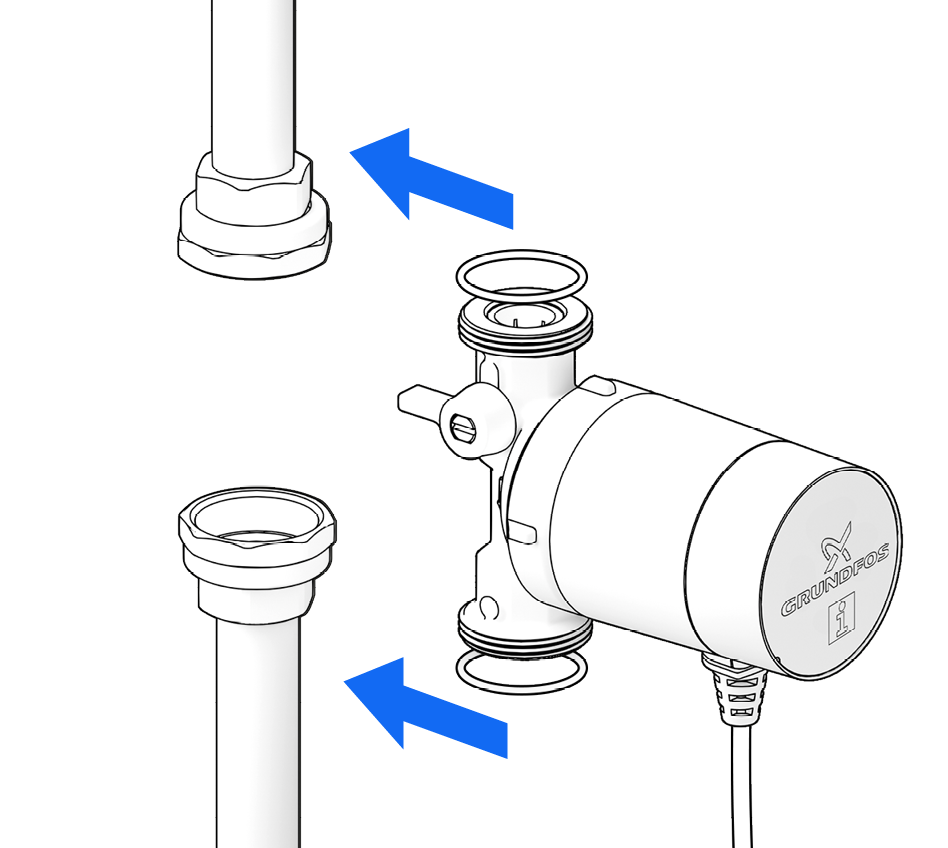
When installing the pump, ensure that it is not under strain.

Tighten the fittings.
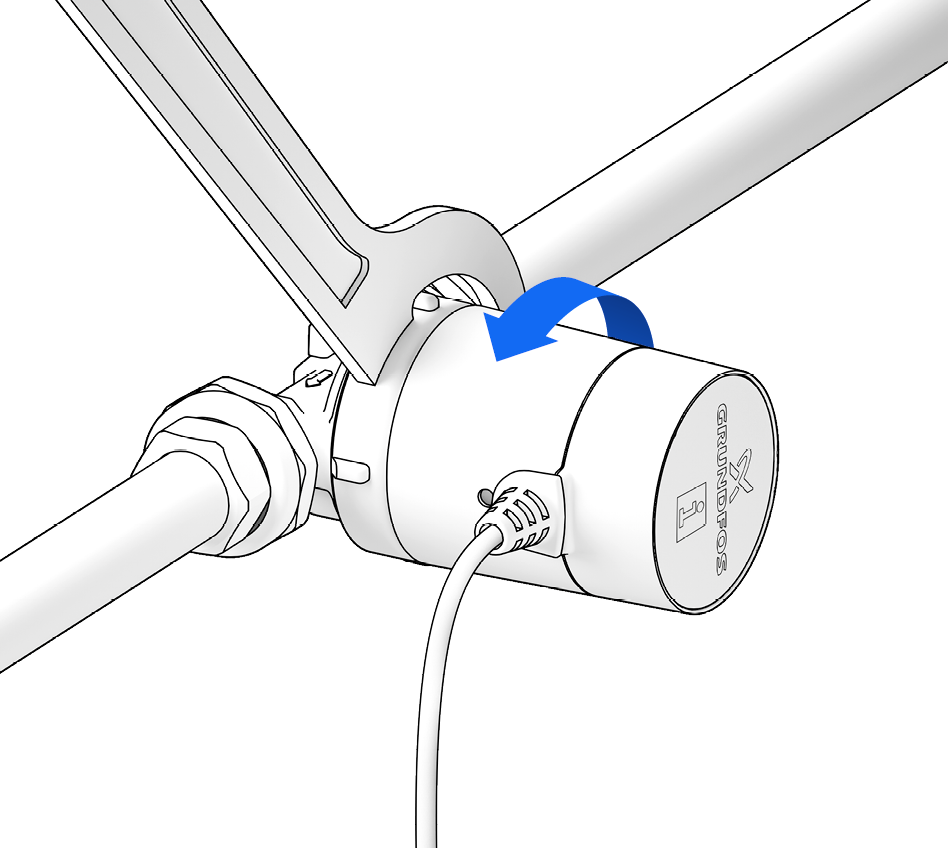
Rotate the pump control panel if necessary so that it is visible (cable exit underneath). To do so, slightly loosen the union nut …
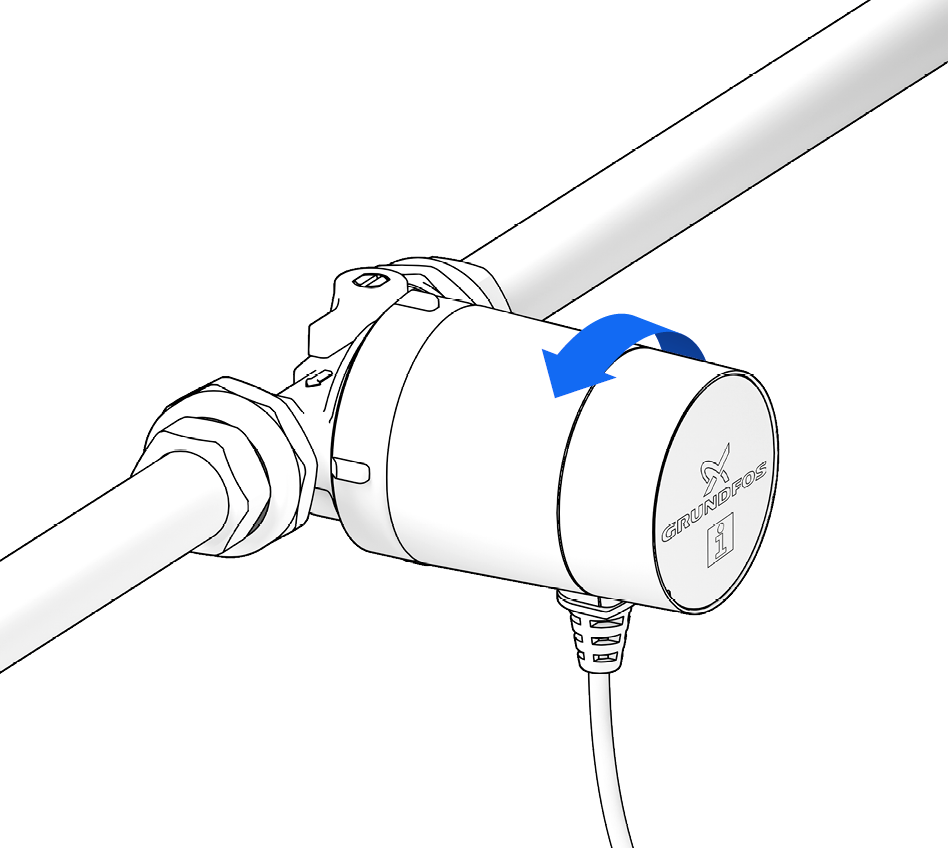
… turn the motor …
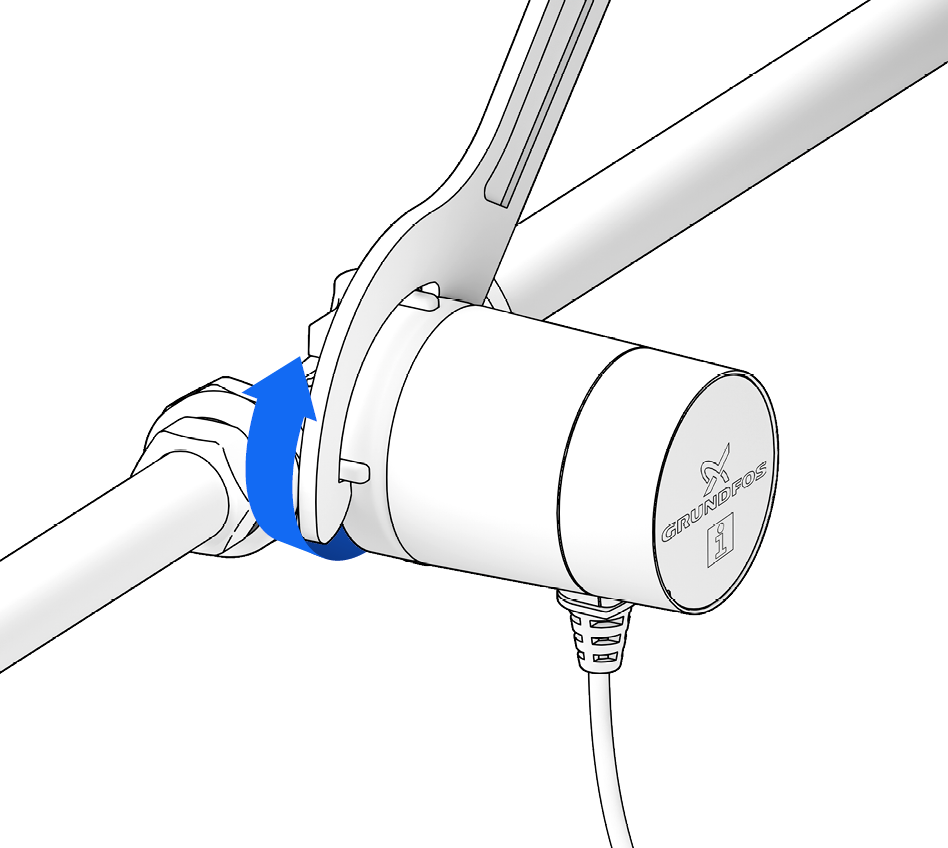
… and retighten the union nut
(max. 20 Nm).
- Fully separating the motor from the pump housing is only necessary for maintenance purposes (see chapters ‘Flushing and Venting’ and ‘Service and Replacement’).
- The pump has dry-running protection. If it runs largely in air, the PCB will repeatedly stop it to protect the rotor bearings. In a fully vented circulation circuit, the pump will run uninterrupted.